| |
| |
Using CloudStorage*
CloudStorage allows you to save any type of file to clients, sessions/events/appointments, invoices, projects, or tasks and then access it from any computer that uses StudioCloud. This tutorial will show you how to take advantage of this feature. Table of Contents
- Edit a client, session/event/appointment, or invoice
- Click on the CloudStorage tab on the far right
- Click the Display List Of Files In Storage button
- Click the Upload Files menu button
- Click the Upload Files In Directory menu option to upload all the files in a directory
- Click the Upload File menu option to upload one file
- Edit a project or task
- Click on the CloudStorage tab on the far right
- Click the Load CloudStorage Files button
- Click the Upload Files menu button
- Click the Upload Files In Directory menu option to upload all the files in a directory
- Click the Upload File menu option to upload one file
If the file is an image, you can click on the View button and you will instantly see the photo your uploaded to the server. If you need to download the file, simply click on Download and choose the location where you would like the file to be downloaded.
Sometimes you may want to upload a file that does not have any relation to a client, event, project, or task. To do this you will need to upload the file through the Manage Cloud Storage window. To do that follow the steps below
- Click on the Cloud Services component
- Click on the CloudStorage tab
- Click the Manage CloudStorage button
- Click the Upload Files menu button
- Click the Upload Files In Directory menu option to upload all the files in a directory
- Click the Upload File menu option to upload one file
Once you have upload a file to Cloud Storage you can share the file with other StudioCloud users that have access to your account. They simply need to login and find the file either under the Manage Cloud Storage window or through the client, event, project, or task that the file was attached to.
If you need to share the file with other users that do not have access to your StudioCloud account then you can use the share button. - Find the file either in the Manage Cloud Storage window or under the client, event, project, or task that the file was attached to and then click the Share button.
- Copy the URL that is displayed on the screen
- Paste the URL Into the Email or Email Template
If you need to share the file with other users that do not have access to your StudioCloud account then you can use the share button. - Find the file either in the Manage Cloud Storage window or under the client, event, project, or task that the file was attached to and then click the Share button.
- Copy the URL that is displayed on the screen
- Highlight the Text in the email or Email Template that you want to make into an HTML Link
- If the HTML Link Already exists and you are updating the link highlight the HTML Link
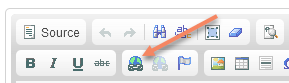
- Click the HTML Link icon on the top bar
- Paste in the CloudStorage URL
If you need to share the file with other users that do not have access to your StudioCloud account then you can use the share button. Find the file either in the Manage Cloud Storage window or under the client, event, project, or task that the file was attached to and then click the Share button. Copy and paste the URL that is displayed on the screen and share it with whomever you choose.
- Create or edit a email template, document templates, or text message template
- Click on the Access CloudStorage button
- Click the Select Action button button for the desired image and then click the Get Web Link To File option
- Copy the link in the share button
- Return to the template window
- Click on the desired location in the template where you want the image
- Click on the house icon at the top and copy and paste the image into the URL

- Click the OK button and you will see the image displayed in the template
|
| |
|
 Categories