| |
| |
How to Customize and Print a Receipt
OverviewThis tutorial explains how to customize a receipt for a payment and print it. How to Customize the Receipt- Click on the Point of Sale component
- Click on the Settings tab
- Click on the Customize Receipt button
- Click the Save button when you are finished customizing the window
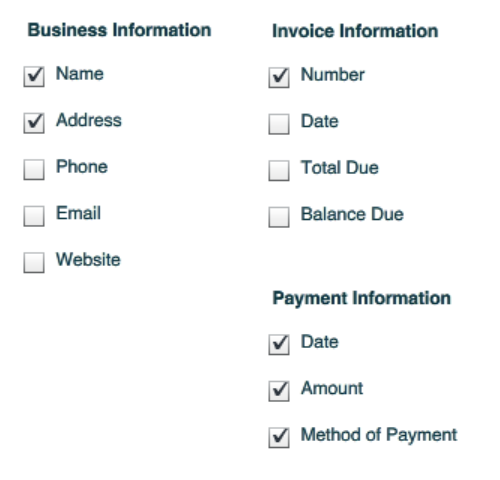
The receipt supports the following customization options: 
How to print the payment receipt.There are two ways to print the payment. - You can edit an invoice and click the payment icon under the payments tab
- You can go to the payments section under point of sale and click the print icon next to the desired payment.
Receipt SetupThe receipt is designed to be printed on a thermal label printer. StudioCloud supports the following thermal label printers.
|
| |
|
