This tutorial explains how to create/edit a CloudForm.
Video Tutorial
How to Create/Edit a CloudForm
Click on the Cloud Services component
Click on the CloudForms tab
Click the Manage CloudForms button
Click the New CloudForm button or edit the desired CloudForm
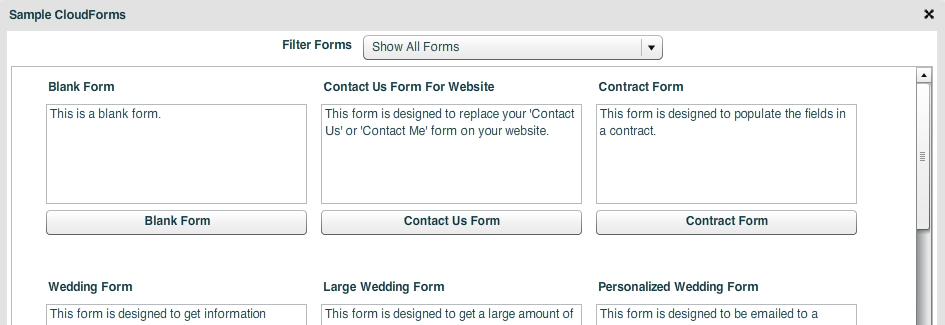
Sample CloudForms
The CloudForms are designed so that you can quickly add or remove items from a CloudForm. Below is a screen shot of the sample cloudforms window that appears when you create a new client.
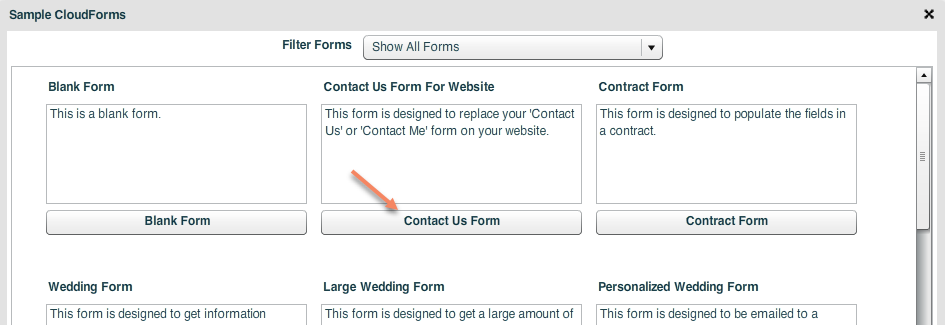
How to Quickly Create a Contact Us CloudForm for a Website
Follow the instructions above to create a new Cloudform
In the Sample CloudForms window click on the Contact Us Form For Website button
Customize the cloudform to meet your specific needs
How to Customize the Look and Feel of the Entire CloudForm
The details tab contains information regarding the overall CloudForm.
Form Name
The form name is not visible to the customer and is only used to identify the form.
Form Title
The form title is the title that is displayed at the top of the browser.
Note: Some browsers will not display the title so you should not enter any information in the title that is necessary to fill out the form. In addition, if the form is embedded in a website the title will also not be visible.
Background Style
This option is for the background color of the form.
The transparent background color will appear white to the customer unless it is embedded in a website. If it is embedded then the background color will be the same color as the website.
The dark background color is a dark background color.
Form Font
This option is for the font used in the form.
Form Text color
This is the color of the text in the form. If you need a color that isn't displayed in the visual drop down box you can add a custom color by typing in a hex color in the drop down color selector box.
Form Text Box Background Color
This is the color for the background text boxes.
Below are examples of some of the different styles of forms that can be created.
How to Edit, Remove, or Reorder Items in a CloudForm
The manage tab shows all of the components added to the form and lets you delete them, edit them, or resort them.
Below is an example of the components being drag and dropped to resort them.
Below is an example of the components being resorted by clicking on the up-down arrows.
How to Add Items to a CloudForm
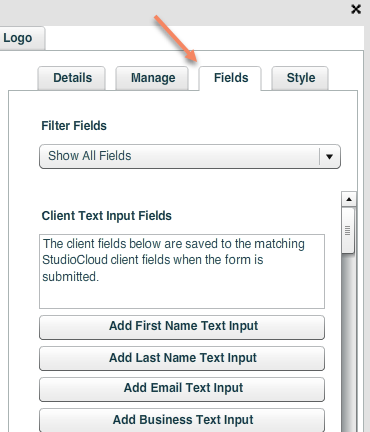
The fields tab lets you add different components to the CloudForm. Below is a breakdown of the items under the Fields tab
Client Fields
These fields will auto populate fields for the client.
For example, the first name field will be automatically mapped to the same first name field when you create or edit a client in StudioCloud.
Client Social Media Components
These fields will auto populate fields for the client.
Components Added To Client Notes
These are custom fields that are automatically mapped to the notes section of the client.
Visual Components
These fields are only used for changing the visual appearance of the form and are not saved anywhere once the form is created.
Event Labels Fields
The event labels are only used when a cloudform is sent from an event and they are only used to display the event date and time.
Event Fields
The event fields are only used when a cloudform is either an online booking form or is sent from an event as a pre-populated personalized event cloudform.
Components Added To Event Details
These fields append information to the event details field and should only be used with an online booking cloudform.
Invoice, Payment, and Online Booking Options
This option lets you add the ability to have invoices automatically created for clients when they fill out the form, have clients make deposits or payments when they fill out the form, or have them schedule a session, event, or appointment from the form.
This adds the submit button to the form which is required for all forms.
StudioCloud suggests adding this at the very end since it usually is the last item in the form.
Spam Prevention
This option lets you add a recaptcha to the CloudForm which prevents spam. This should only be added to forms that are added to your website.
How to Customize The Settings For A CloudForm
The options under the "Form Settings" tab are options that occur after the client clicks the submit button or while the client is filling out the form.
Include In Client Portal
This option will automatically add the from to the client portal under the "Forms & Contacts" section
Client Portal Client Update Form
This option will include a button to the selected cloudform in the client portal where the client can update their contact info.
New Client Type Options
This option lets you select what type of client will be created when the form is filled out.
A client is usually a paying client
A prospective client is a client that will be marketed to in the future
A lead is a potential client that is actively being worked with to convert to a paying client
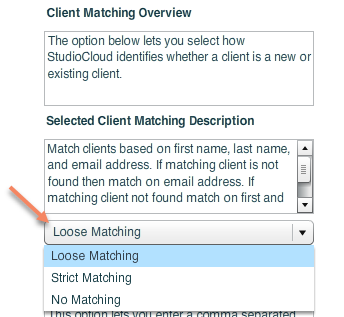
Matching Options
This option lets you select how StudioCloud matches clients that fill out the form with existing clients
Here is a breakdown of each option
Loose Matching (Default Option)
Match clients based on first name, last name, and email address. If matching client is not found then match on email address. If matching client not found match on first and last name. If matching client not found create a new client.
Strict Matching
Match clients based on first name, last name, and email address. If client not found create a new client.
No Matching
Do not match clients. Always create a new client.
Email To Business
This option lets you enter a comma separated list of email addresses that will receive the details that the client entered into the form.
Email Template Response
This option lets you select a email template to be emailed to the client when they fill out the form. The information that they enter into the form can be integrated into the email template as well.
Signed Contract
This option lets you select a contract template. The client will automatically be forwarded to esign a contract when they finish filling out the form. The information that they enter into the form can be integrated into the contract template as well.
This option lets you automatically have a client pipeline assigned to a client when they fill out the form. This is typically used for lead tracking.
Auto Tag Respondent
This option lets you automatically tag a client when they fill out the form. This is useful for reporting purposes or for contacting all of the clients that filled out a specific form.
Popup Message
The option lets you customize popup message that your clients will receive when submitting a Cloudform.
Third Party Tracking Custom Code
This option lets you insert any custom code that you want into the link below to track the form views. This should only be used if you are using a third party tracking system like google analytics to track form views.
 Categories