Availability
Subscription: PartnerBoost or EmployeeBoost
Please note, Calendar Filters, Equipment, and Locations are only available with the EmployeeBoost subscription.
Overview
The StudioCloud scheduler is a column based view of your calendar where a column can be an employee, equipment, location, or calendar filter.
How to Find the Scheduler
- Click on the Calendar component
- Select the Calendar tab
- Click the Scheduler button
How to Use the Scheduler
On the left hand side of the scheduler you will see a table with the label Resources Viewed In Table. This table shows the resources that will be shown in the scheduler as columns. Right below that you will see two radio buttons Select by Calendar Filter and Manually Select Resources. You will need to select one of these in order to add resources to the "Resources Viewed In Table"
How to Use the Scheduler With Calendar Filters (EmployeeBoost Only Feature)
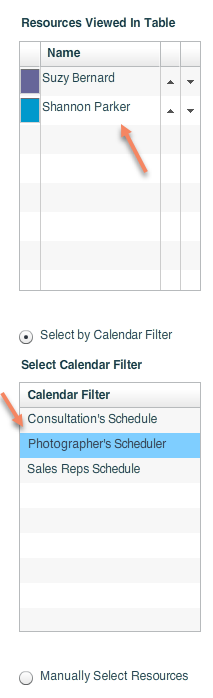
If you use calendar filters (you can learn more about Calendar Filters here How to Create, Edit or Use Calendar Filters) then you can double click the calendar filter you want to use and it will automatically select the resources in that filter and put them in the Resources Viewed In Table.
- In the example below the calendar filter "Photographer's Schedule" was selected and the employees "Suzy Bernard" and "Shannon Parker" were automatically added to the "Resources Viewed In Table" section.
How to Use the Scheduler With Manually Selected Resources
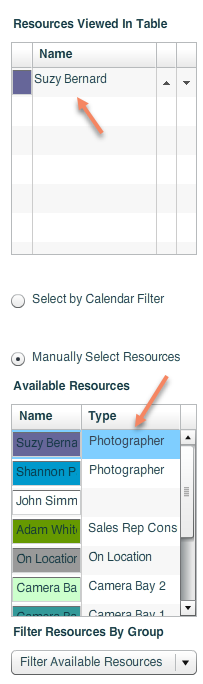
If you use the Manually Select Resources option, which will display all of the resources, you can double-click the resources you want to see in the scheduler.
Right below the Manually Select Resources option you will see a combo box labeled Filter Resources By Group where you can quickly view the columns based on scheduling role. This feature is only available for EmployeeBoost subscribers.
- In the example below the employee "Suzy Bernard" was double clicked on under the "Available Resources" header which moved her to the "Resources Viewed In Table" section.
How to Edit Events
- You can create a new event by clicking and dragging on the calendar for the time frame that you want.
- You can edit and delete events by double-clicking an event in the table.
- You can also edit when an event occurs by dragging it left or right in the table.
How to View When Employees Or Locations Are Available
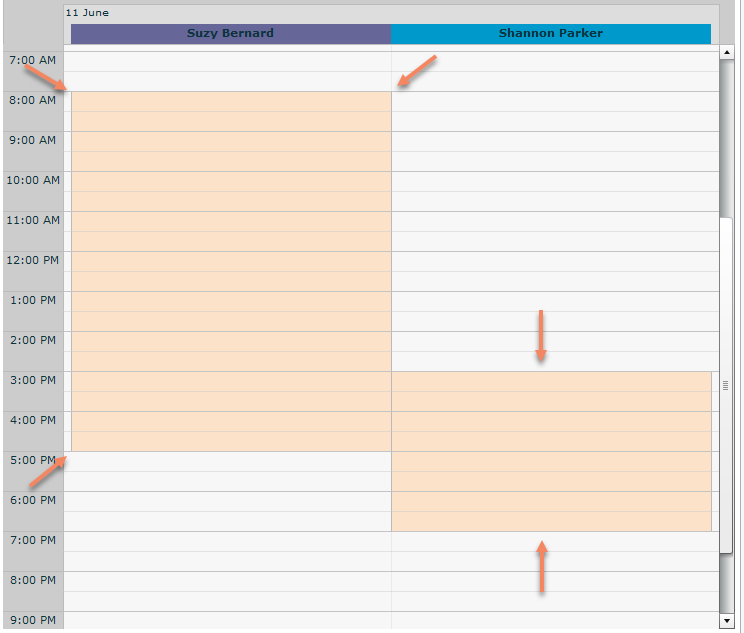
- The orange background color shows when the employees or resources are available. By default the availability is the same as the overall business hours.
- In the example below "Suzy Bernard" is available the same hours as the overall business while "Shannon Parker" is available only at specific hours and on specific dates.
 Categories